If you get it right, using a flat lay is the perfect way to ensure your chosen interior design scheme is seamless. Take the lead from our Studio partner VADO as they walk you through the key steps for creating an effective flatlay for your next project.
Before constructing your flat lay, it is important to consider where you are going to shoot it. A naturally lit room is usually your best option, especially if you are not a whizz when it comes to editing images. If it is a bright day, consider exactly where you position your flat lay to ensure your props do not create too much shadow, although some shadow is good for depth.
A simple, neutral background is usually preferred for a flat lay to ensure your props and chosen accessories stand out. However, as this flat lay is for the bathroom why not get creative with concrete slabs, natural wood, or marble effect paper, so long as they are in keeping with your theme. Your chosen tiles or flooring could be arranged to create your background or even your bath linen. These are also great options for props though, so try a few options to see what works best for you.
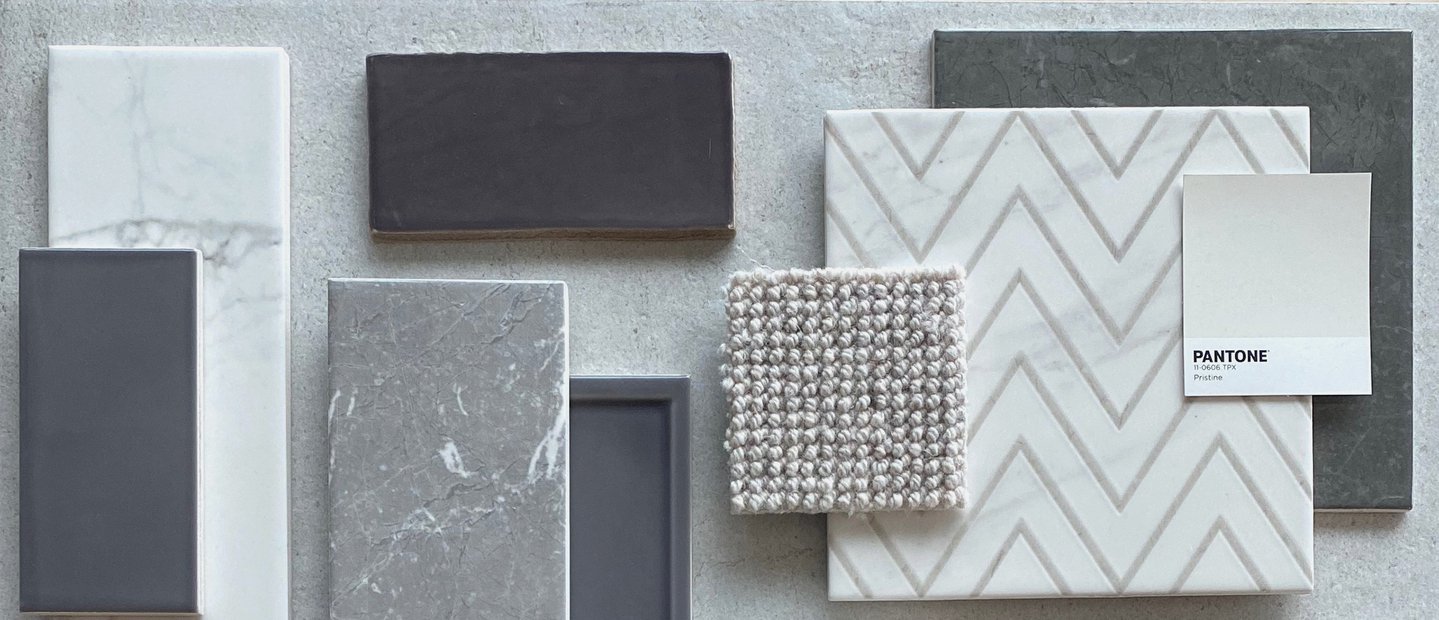
When designing your bathroom, it is a great idea to request samples for your tiles, flooring and paint choices. Not only do samples give you the opportunity to check finish and quality in the natural lighting of your own bathroom, but they are also an important element of your chosen theme and should take centre stage on your flat lay. For example, something as simple as a paint chart is a great way to display your chosen colour palette.

Flatlay example
Now comes the fun part, bringing together all of your chosen design elements! Whether you are aiming for a look that effortlessly coordinates or pops of colour that offer contrast, this is your opportunity to ensure your chosen accessories, brassware and finishing details combine to create your dream bathroom.
Your props could include:
Layering is key when it comes to building your flat lay, so start with the largest items as the base. There are also flat lay templates you can follow to ensure a professional finish. Your choice of template could depend on the theme of your bathroom. A symmetrical format would suit a modern bathroom with square brassware, whilst a grid template lends itself to a geometric theme and would complement tiles with a linear pattern. If you are going for a soft look and feel then try draping your bath linen on your flat lay for a natural, relaxed vibe. Just ensure your flat lay is evenly weighted either side and be careful not to over clutter, sometimes the rule of ‘less is more’ gives better impact.
So, we already know natural light creates beautiful photography, but how do you get that perfect shot? The clue is in the name, a flat lay must be shot from a bird’s eye view with a flat camera angle, a kitchen chair might come in handy here! When it comes to editing, you don’t need professional tools to give your flat lay a flawless finish. Most phones will allow you to crop your image and adjust the lighting, plus there are also plenty of free and easy to use apps. Be careful not to over edit though, otherwise you risk losing the natural finish of your tiles, brassware and could change the colour tones of your paint samples. If editing is not your thing, then don’t worry, if you have followed the simple steps above, your flat lay will already have a professional look and feel.
